
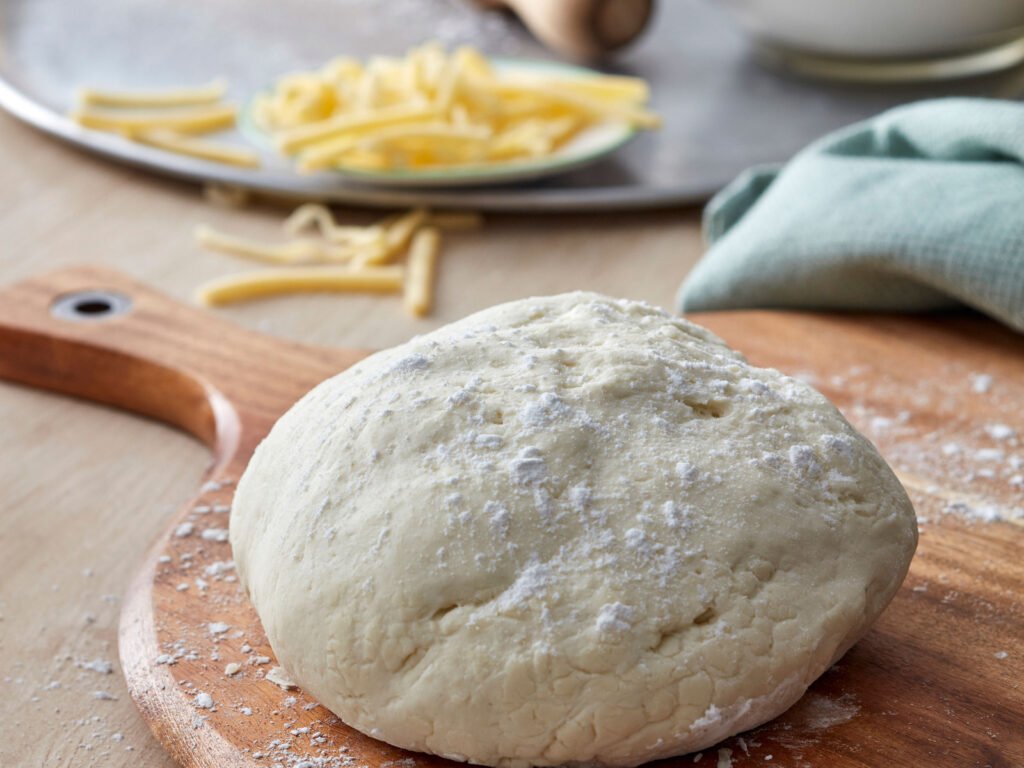
This classic gluten free pizza recipe uses only 6 ingredients and is simple to make and shape just like real dough. It needs only one rise and there is no kneading required.
I originally developed this recipe for my first cookbook in 2020, and I’ve continued improving it over the years. It has become a regular Friday night meal in my home and in many other homes every week!
Recipe Notes
- Authentic taste & texture: The crust is light and crispy on the outside while staying chewy in the middle. It has plenty of delicious yeasty flavor, especially when you allow the dough to rise slowly in the refrigerator.
- Quick & easy: Add the 6 ingredients in this recipe, including water, to your mixer bowl and beat everything together. That’s really all you need to do to make the dough.
- Versatile: Keep it simple with traditional sauce and cheese, or add pepperoni, sausage, mushrooms, peppers, and three kinds of cheese. This crust is sturdy enough to hold plenty of toppings.
- Make ahead: You can prepare the dough in advance and keep it refrigerated for at least 3 days before shaping and baking. You can also parbake a shaped crust and freeze it for an easy dinner later.
Recipe Ingredients
- Gluten free flour: A good-quality, well-balanced all purpose gluten free flour blend should work well, including one that already contains xanthan gum. There is no need to buy several unfamiliar individual flours for this easy recipe.
- Instant yeast: Also known as rapid-rise or breadmaker yeast, this can be added directly to the dry ingredients. There is no need to proof it in water first.
- Sugar: A small amount helps feed the yeast without making the dough taste sweet.
- Salt: Salt brings out the flavor of the pizza and keeps the bread from tasting bland. It also helps control yeast activity.
- Olive oil: Olive oil adds flavor, richness, and tenderness to the dough.
- Water: Water hydrates the flour and other dry ingredients and brings everything together. Warm water helps activate the yeast more effectively.
How to Make Gluten Free Pizza Dough
In the bowl of a stand mixer, whisk together the gluten free flour blend, xanthan gum, sugar, and salt. Add the yeast and whisk it in. Pour in the warm water and olive oil, then mix with the paddle attachment until the dough begins sticking to the sides of the bowl and develops a slightly whipped appearance, about 5 minutes.
Move the dough into a sealed container with a tight-fitting lid, or place it in a bowl and cover it tightly with plastic wrap. Let it rise for about 1 hour, or until it has grown to around 50% larger than its original size. The dough will not double. You can also let it rise in the refrigerator for up to 3 days.
If you allow the dough to rise at room temperature, refrigerate it for at least 15 minutes before shaping. Divide the dough in half, sprinkle it with additional flour, and use floured fingers to press it from the center toward the edges until you have a round about 10 inches in diameter.
Place the dough on a sheet of parchment paper on a pizza peel. Use a pizza roller or rolling pin to smooth it out from the center toward the edges. Brush the top and edges with olive oil, then bake for about 5 minutes at 400°F on a pizza stone or overturned baking sheet.
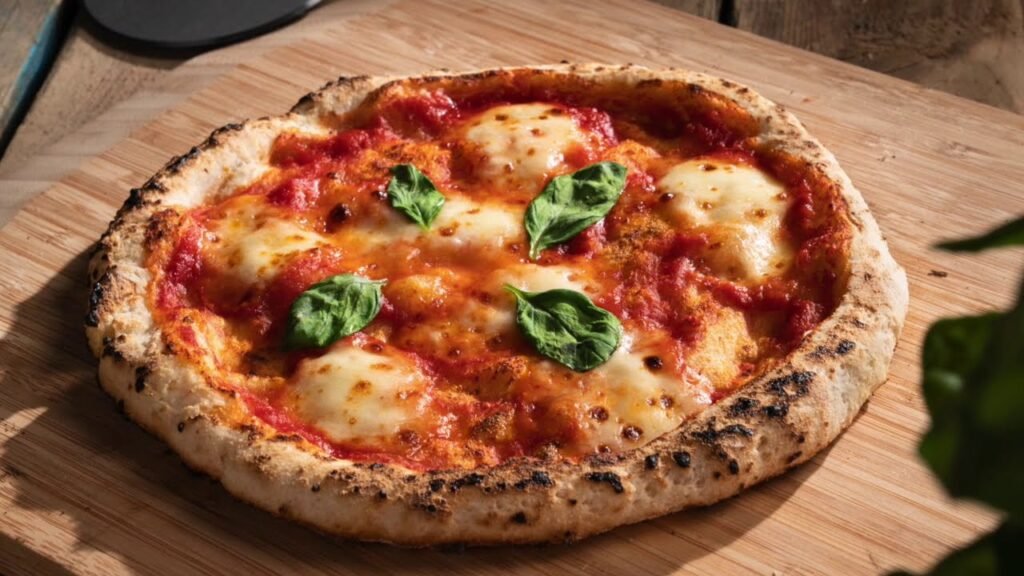
Once the crust has started to blister and firm up, add tomato sauce and shredded cheese. Bake for another 7 minutes, or until the cheese is melted and bubbling and the crust has turned light brown. Let the pizza rest briefly, then slice and enjoy!
Expert Tips
Beat the Dough Well
The instructions in the recipe card tell you to beat the dough until it starts looking whipped. At first, the dough will gather around the paddle attachment. Continue mixing at a high enough speed and it will begin sticking to the sides of the bowl while taking on a more aerated appearance.
Rest the Dough in the Refrigerator
Once your raw pizza dough is prepared, let it rest in the refrigerator. This gives the flour time to absorb the water, so the dough stays hydrated but becomes much less sticky. Chilled dough is considerably easier to handle than warm dough, so working with it directly from the refrigerator is ideal.
Working With Sticky Dough
If you do not have enough time to chill the dough longer, or it simply is not cold enough, it may still feel slightly sticky. Sprinkle it with a little more gluten free flour and handle it gently. Another option is to lightly oil your hands before working with it.
For Chewier Dough
For a chewier crust, replace 1/4 cup (36 grams) of the all purpose gluten free flour blend with Expandex modified tapioca starch or regular tapioca starch/flour. If using Expandex, add another 1 1/2 fluid ounces of water. You do not need the extra water when using regular tapioca starch.
Parbake the Crust
You can partially bake, or parbake, the risen, chilled, and shaped crust at 400°F for about 7 minutes. Allow it to cool completely, wrap it tightly, and keep it for later that day or even the following day.
Ingredient Substitutions
Dairy Free
The pizza recipe itself is already dairy-free. If you want a dairy-free cheese topping, Daiya, Miyoko’s Creamery, and Violife all make good nondairy mozzarella-style cheese shreds.
Olive Oil
Olive oil gives this dough a lot of flavor and also helps the crust brown when brushed over the shaped dough. You can substitute your preferred cooking oil, but keep in mind that it will change the final flavor.
Yeast
If you prefer active dry yeast, you can substitute it for instant yeast. Instead of 9 grams of instant yeast, use 25% more, which is about 11 grams or 3 2/3 teaspoons of active dry yeast. Dissolve the active dry yeast in 1/4 cup of the warm water from the recipe first. Then add it to the mixing bowl along with the remaining water.
Xanthan Gum
If your all purpose gluten free flour blend does not contain xanthan gum and you would rather not use xanthan gum, you can substitute an equal amount of konjac powder. It is also available on Amazon.
When using Bob’s Red Mill 1-to-1 gluten free flour, add at least another 1 teaspoon of xanthan gum or konjac powder because it does not contain enough xanthan gum to provide the structure needed for yeast bread.
To substitute xanthan gum with psyllium husk, use 20 grams of psyllium husk powder. First, dissolve the psyllium husk in the water called for in the recipe and allow it to form a gel. Then add it after the olive oil has been added.
Easy Gluten Free Pizza Recipe
This basic gluten free pizza dough requires only 6 ingredients and creates a crust that is crispy on the outside and chewy inside.
Prep: 10 minutes
Cook: 30 minutes
Rising Time: 1 hour
Total Time: 1 hour 40 minutes
Yield: 2 pizza crusts
Equipment
- Stand mixer with paddle attachment or food processor with plastic blade
- Pizza stone recommended, or an overturned rimmed baking sheet
- Pastry brush for brushing the raw dough with olive oil, or use your fingers
- Plastic bucket for proofing, or a bowl covered tightly with plastic wrap
Ingredients
- 3 cups (420 g) all purpose gluten free flour blend, plus extra for sprinkling
- 3 teaspoons xanthan gum, omit if your flour blend already contains it
- 1 tablespoon (9 g) instant yeast
- 1 ½ teaspoons (6 g) granulated sugar
- 1 ½ teaspoons (9 g) kosher salt
- 1 ⅛ cups (9 ounces) warm water, about 95°F (see Recipe Notes about chewier crust)
- 4.5 tablespoons (63 g) extra-virgin olive oil, plus more for brushing
- Your favorite pizza toppings
Instructions
Make the Pizza Dough
- Place the flour, xanthan gum, optional Expandex, yeast, and sugar in the bowl of your stand mixer fitted with the paddle attachment, or into your food processor fitted with the plastic blade. Whisk the dry ingredients together with a separate handheld whisk.
- Add the salt and whisk again until everything is evenly combined.
- Pour in the water and olive oil. Mix on medium speed in the stand mixer, or pulse in the food processor, until the dough begins coming together.
- Increase the mixer to high speed, or turn the food processor on, and continue processing until the dough stops looking like a ball and starts to look whipped, about 3 minutes.
- This step adds air to the dough, helping it become easier to handle after chilling and giving it a better rise in the oven.
- Transfer the dough to an oiled container with a tight-fitting lid or a greased bowl. Lightly spray the surface with cooking oil spray and cover tightly.
- Let the dough rise in a warm, draft-free place until it reaches about 150% of its original volume, which takes around 1 hour. You can also refrigerate the dough for up to 3 days.
- When ready to make the pizza, place a pizza stone or overturned rimmed baking sheet in the oven and preheat it to 400°F.
- If the dough has been refrigerated, shape it directly from the refrigerator. If it has not been refrigerated, place the sealed dough in the refrigerator for at least 15 minutes before working with it. Chilled dough is much easier to handle.
- Put the dough on a lightly floured work surface and sprinkle the top with a small amount of additional flour. Gently knead it until it becomes smoother and less sticky, then divide it into two equal pieces. Keep the unused piece covered so it does not dry out.
- Using floured fingers, shape the first portion into a ball and press it into a disk. Press from the center outward with your fingers to create a round disk with a slightly raised edge.
- Continue pressing toward the outside until the dough reaches approximately 10 inches in diameter. Move the dough regularly and add a little more flour when needed to prevent sticking.
Bake the Pizza
- Place a large sheet of unbleached parchment paper on the pizza peel or cutting board you will use to transfer the dough into the oven. Carefully lift the dough onto the parchment.
- While the dough is on the parchment, use a small rolling pin or pizza roller to smooth any uneven areas left by your fingers. The finished dough should be about 11 to 12 inches in diameter.
- Brush the surface of the dough with olive oil using a pastry brush or your fingers, making sure the edges receive a generous coating.
- Transfer the dough, along with the parchment, onto the pizza stone or baking sheet in the preheated oven. Bake the plain crust for 5 to 7 minutes, until the underside begins to crisp.
- Remove the crust from the oven using a pizza peel or large spatula. At this stage, you can let the parbaked crust cool completely, wrap it tightly, and freeze it for at least one month. Thaw it at room temperature before continuing with the recipe.
- Add your favorite toppings to the parbaked crust and return it to the hot oven. Continue baking until the cheese melts and the edges become browned and nicely puffed, about another 5 to 7 minutes.
- Take the finished pizza from the oven using a pizza peel or large spatula. Let it rest for about 5 minutes before slicing and serving.
Notes
Flour Blends
My preferred gluten free flour blends are Better Batter’s original blend gluten free flour and Nicole’s Best multipurpose blend, with added xanthan gum.
Cup4Cup has changed its formula and does not appear to perform as well as it once did, so I do not recommend it for this recipe. If you want to create your own blend using one of my “mock” recipes, visit the all purpose gluten free flour blends page.
You may also be able to prepare this recipe with Caputo Fioreglut flour or King Arthur Flour gluten free bread flour. However, both varieties absorb considerably more moisture and may produce a crust that is less tender. The dough itself should still be fairly easy to handle.
Optional Variation for Chewier Pizza
For a chewier pizza crust, use 2 3/4 cups (385 g) all purpose gluten free flour instead of 3 cups and add 1/4 cup (36 g) Expandex modified tapioca starch. Increase the water to 10 1/2 ounces, or 1 1/4 cups + 1 tablespoon.
If you do not have Expandex, regular tapioca starch can be used instead. Add 1/4 cup regular tapioca starch without changing the amount of water.
Xanthan Gum
To use psyllium husk instead of xanthan gum, try 20 grams of psyllium husk powder. Dissolve it in the water first and allow it to gel, then add the mixture after adding the olive oil.
You can also replace xanthan gum with an equal amount of konjac powder without making any other changes.
Nutritional Information
The nutrition information is an estimate and is calculated per pizza without any toppings.
Nutrition
Serving: 1 pizza | Calories: 305kcal | Carbohydrates: 171g | Protein: 8g | Fat: 32g | Saturated Fat: 4g | Polyunsaturated Fat: 3g | Monounsaturated Fat: 23g | Sodium: 1930mg | Potassium: 27mg | Fiber: 10g | Sugar: 3g | Vitamin C: 0.01mg | Calcium: 6mg | Iron: 0.2mg
Nutrition information is automatically calculated and should be treated only as an estimate.
Instructions
The raw dough can be kept in a sealed container in the refrigerator for at least 3 days. Since cold dough is easier to work with, shape it directly from the refrigerator.
I do not recommend freezing raw yeast dough because freezing can damage or kill the yeast. Instead, parbake the shaped crust, allow it to cool completely, wrap it tightly, and freeze it for up to 3 months. Thaw the crust at room temperature, add your toppings, and finish baking according to the recipe instructions.
Leftover pizza slices can be wrapped tightly in freezer-safe wrap and stored in the refrigerator for up to 3 days. To refresh them, unwrap the slices, sprinkle them lightly with water, and place them in a toaster oven at 300°F for about 5 minutes, or until heated through and refreshed.