
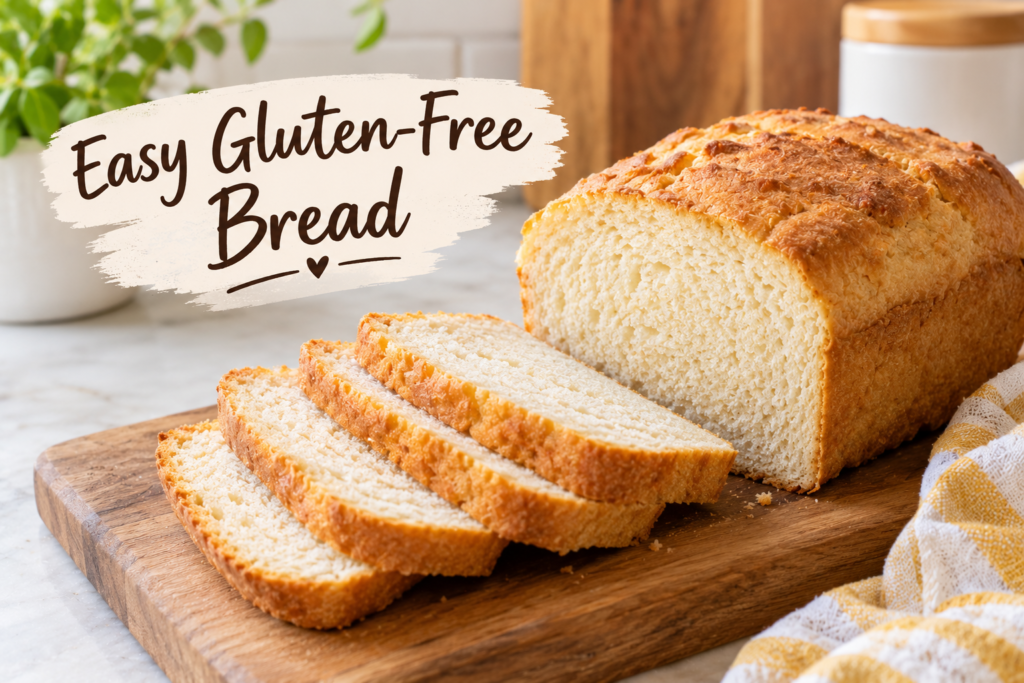
Making homemade gluten-free bread is easier than you may think! This easy gluten-free bread recipe is baked right in the oven and gives you a soft, fluffy white sandwich bread that is easy to slice and enjoy.
I make this bread every week for my family and use it for sandwiches, toast, and other everyday meals. It has a soft texture, bends easily, and does not feel dry or crumbly like some gluten-free breads.
Gluten-Free Bread Recipe
For years, readers have asked me how to make my gluten-free bread machine recipe in the oven. I usually bake my bread in an Oster bread machine using the gluten-free setting, but I wanted to create a version that could be made easily in a regular oven.
This homemade oven-baked gluten-free bread is also completely dairy-free, which is important for my family. Instead of using milk, this recipe uses olive oil and warm water to add moisture and help create a soft loaf.
The result is a delicious gluten-free sandwich bread with a soft texture. It bends, squishes, and slices easily, making it perfect for everyday sandwiches.
Gluten-Free Baking Tips
A few simple tips can help you get the best results when making gluten-free bread:
- Let the bread rise in a warm place. Bread rises best when it is warm. My oven has a bread-proofing setting that keeps the temperature around 100°F.
- Use the right loaf pan. A 9-inch x 4-inch small Pullman loaf pan works best for this recipe. You can also use a 9-inch x 5-inch bread pan, but the bread will not rise as tall. I highly recommend the smaller Pullman pan.
- Measure gluten-free flour correctly. The best method is the “spoon and level” method. Spoon the flour into your measuring cup and then level the top with the back of a knife. Do not scoop the flour directly from the bag with the measuring cup because you may end up with too much flour.
- Do not over-proof the dough. Gluten-free dough does not benefit from rising for too long. Once the dough has doubled in size, it is ready to bake.
Easy Gluten-Free Bread
Servings: 16
Prep Time: 34 minutes
Cook Time: 30 minutes
Total Time: 1 hour 4 minutes
This easy gluten-free bread is baked in the oven and makes a soft, fluffy white sandwich loaf. It has a great texture, bends easily, and is simple to slice. The bread is also naturally dairy-free.
Equipment
- 1 stand mixer
Ingredients
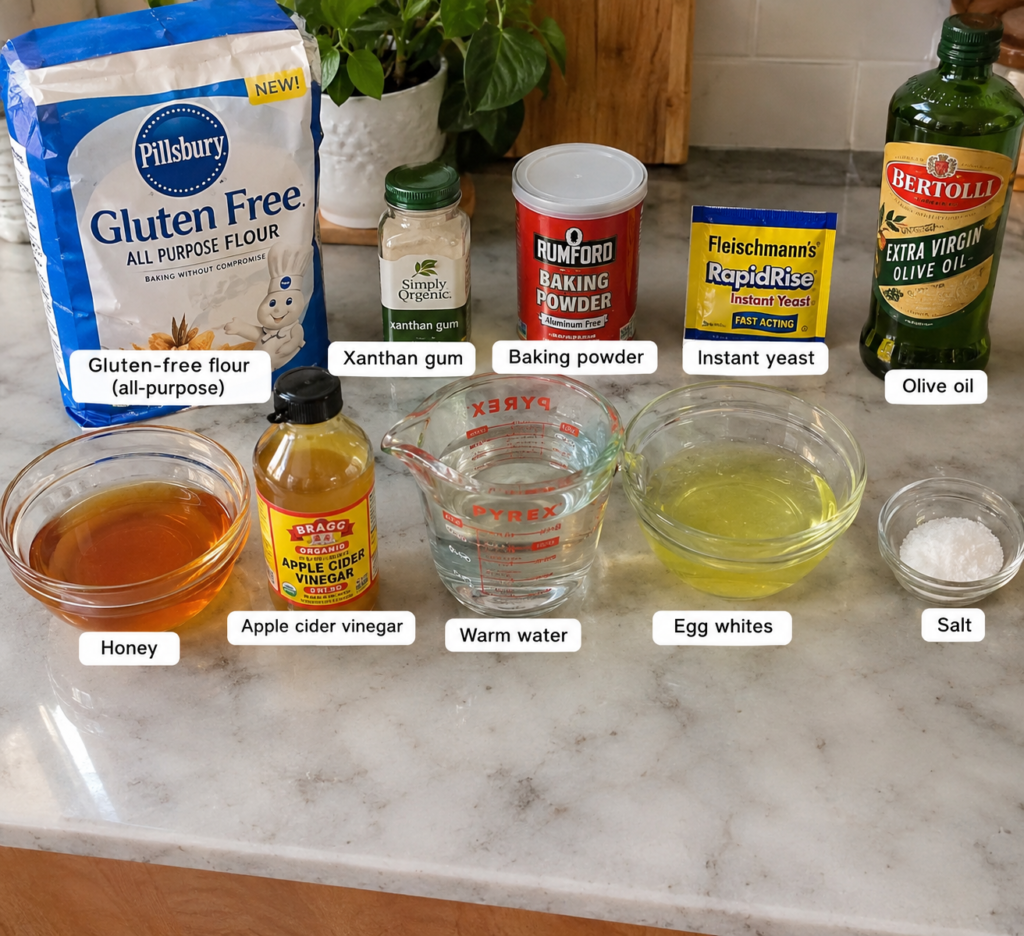
- 2 1/2 cups (313 g) all-purpose gluten-free flour – I like Pillsbury gluten-free flour. Keep in mind that different gluten-free flour blends can give different baking results. Bob’s Red Mill 1-to-1 and King Arthur Measure for Measure state on their website and/or packaging that their blends are not recommended for yeast baking.
- 1 teaspoon (3 g) xanthan gum – Leave this out if your gluten-free flour already contains xanthan gum.
- 1 teaspoon (4 g) gluten-free baking powder
- 1 packet (7 g) rapid-rise or instant yeast – about 2 1/4 teaspoons
- 1/4 cup (54 g) extra virgin olive oil
- 1/4 cup (85 g) honey – You can also use agave nectar or maple syrup.
- 1 teaspoon (5 g) apple cider vinegar
- 1 1/2 cups (355 g) warm water – 100°F to 110°F
- 3 egg whites (90 g) – from large eggs and at room temperature
- 1 teaspoon (6 g) salt
How to Make Gluten-Free Bread
1. Prepare the Oven and Pan
Spray a 9-inch x 5-inch bread pan or a 9-inch x 4-inch small Pullman loaf pan with gluten-free cooking spray.
Move the top oven rack to the middle position and preheat the oven to 350°F. I prefer using a 9-inch x 4-inch small Pullman loaf pan for this recipe.
2. Mix the Dry Ingredients
Add the gluten-free flour, baking powder, and instant yeast to a large mixing bowl. Stir until everything is well combined.
3. Add the Wet Ingredients
Add the olive oil, honey, apple cider vinegar, and warm water to the flour mixture.
Mix on low speed for about 1 minute. If you are using a stand mixer, use the paddle attachment, not the dough hook.
4. Add the Egg Whites and Salt
Add the egg whites and salt to the dough. Mix on medium speed for about 1 minute.
The dough will not look like traditional bread dough. Instead, it should have the consistency of a thick cake batter.
5. Transfer the Dough to the Pan
Pour the gluten-free dough into your prepared 9-inch x 5-inch bread pan or 9-inch x 4-inch small Pullman loaf pan.
For the best results, I highly recommend using the smaller Pullman loaf pan.
Spray a piece of plastic wrap with gluten-free cooking spray and place it over the top of the pan. Cover the pan with a kitchen towel and let the dough rise in a warm place for about 30 minutes.
6. Bake the Bread
Once the dough has risen, place the pan horizontally on the middle oven rack.
Bake at 350°F for about 30 minutes.
The bread should be golden brown on top and reach an internal temperature of 205°F to 210°F.
7. Cool Before Slicing
Let the bread cool in the pan for about 10 minutes.
Then remove the loaf from the pan and place it on a cooling rack. Do not leave the bread in the pan until it is completely cool. Trapped steam can make the bottom of the loaf soggy.
Allow the bread to cool completely before slicing.
Use a serrated knife to cut the bread. A smooth-blade knife can press down on the soft loaf and squish it.
How to Store Gluten-Free Bread
Once the bread has completely cooled, place it in an airtight container. It can be stored at room temperature on the counter.
It is better not to slice the entire loaf before storing it. Instead, keep the remaining loaf whole and slice pieces as you need them.
Can You Freeze Gluten-Free Bread?
Yes! This gluten-free bread can be frozen for up to 3 months.
Make sure the loaf is completely cool before freezing. Wrap it tightly in plastic wrap and then wrap it again in foil or freezer paper. Place the wrapped loaf inside a freezer bag.
When you are ready to eat it, thaw the bread in the refrigerator overnight.
Gluten-Free Bread Notes
Rapid-rise yeast: I used Fleischmann’s Rapid Rise Yeast. It should be at room temperature and does not need to be proofed first. You can mix it directly with the dry ingredients.
The warm water is important for the yeast. Keep the water between 100°F and 110°F. Water that is too hot can kill the yeast, while water that is too cold may not activate it properly.
If you want to check whether your yeast is active, you can dissolve the honey in warm water, add the yeast, and let it sit for about 5 minutes. It should become bubbly.
Room-temperature ingredients: For the best results, use room-temperature ingredients. Let the egg whites and water sit on the counter for about 5 minutes before using them. Yeast works best in a warm environment.
Nutrition
Serving: 1 serving
Calories: 114 kcal
Carbohydrates: 18 g
Protein: 3 g
Fat: 4 g
Saturated Fat: 0.5 g
Polyunsaturated Fat: 0.5 g
Monounsaturated Fat: 3 g
Sodium: 189 mg
Potassium: 18 mg
Fiber: 2 g
Sugar: 5 g
Vitamin C: 0.03 mg
Calcium: 29 mg
Iron: 1 mg
Nutrition information is automatically calculated and should only be used as an estimate.
Course: Baking
How to Make Gluten-Free Bread Step-by-Step
Gather the Ingredients
Gather all of your ingredients before you begin.
Prepare the Bread Pan
Spray a 9-inch x 5-inch bread pan with gluten-free cooking spray.
In a large bowl, combine 2 1/2 cups of gluten-free flour, 1 teaspoon of baking powder, and 1 packet of instant yeast. Stir everything together.
Make the Dough
Add the egg whites and salt to the mixture. Mix on medium speed for about 1 minute.
The dough should look more like a thick cake batter than traditional bread dough.
Fill the Pan
Pour the gluten-free dough into the greased 9-inch x 5-inch bread pan.
Spray plastic wrap with gluten-free cooking spray and place it over the pan. Cover the pan with a kitchen towel.
Let the Dough Rise
Place the covered dough in a warm area and let it rise for about 30 minutes.
The dough should rise and become noticeably larger.
Bake
Once the dough has finished rising, place the pan horizontally on the middle oven rack.
Bake at 350°F for 30 minutes. The bread should turn golden brown and reach an internal temperature of 205°F to 210°F.
Cool the Bread
Let the bread cool in the pan for 10 minutes. Remove it from the pan and place it on a cooling rack.
Allow it to cool completely before slicing.
Making Gluten-Free Bread in a Bread Machine
Although I created this recipe to be baked in the oven, I also tested it in my bread machine.
To make it in a bread machine, swap the ingredients for the ingredients listed in my gluten-free bread machine recipe and follow those directions.
I recommend using a bread machine with a gluten-free setting for the best results.
Serving Suggestions
This is a great everyday gluten-free bread recipe. I make this sandwich bread for my family every week.
Enjoy it toasted for breakfast or use it to make sandwiches. It also works well for simple homemade sandwiches like Uncrustables.
Storage Instructions
Always let the bread cool completely before storing it.
Keep the leftover bread in an airtight container at room temperature. For the best texture, avoid slicing the whole loaf before storing it. Keep the remaining loaf whole and slice it when needed.
You can also freeze the bread for up to 3 months. Wrap the cooled loaf tightly in plastic wrap, followed by foil or freezer paper, and place it in a freezer bag.
Thaw the frozen bread in the refrigerator overnight.