
Dry, boring chicken? We’ve all been there. The good news is, making juicy sauteed chicken breasts is actually super easy. All you need is a pan, a little oil or butter, and a few simple steps. I’ve cooked chicken this way many times, and it always comes out golden, tender, and full of flavor — perfect for a quick weeknight meal.
The trick is to let the chicken cook without moving it around too much. This gives it a nice golden crust and keeps the juices inside. When cooked this way, your chicken will stay moist and taste amazing every time. It’s my favorite skillet chicken recipe because it works even when I’m in a rush.
You can keep it simple with just salt and pepper, or mix in garlic powder, Italian herbs, or paprika for extra flavor. Once you know how to cook chicken breast the right way, you can use it for salads, wraps, rice bowls, or just eat it on its own. This is one of those recipes every home cook should know — easy, healthy, and delicious.
Why Sauteed Chicken Breasts Are a Weeknight Hero
Quick Cooking Time, Big Flavor
Sauteed chicken cooks fast — usually in 15 to 20 minutes. This makes it perfect for busy nights when you want dinner on the table quickly. The hot pan gives the chicken a nice golden crust while keeping the inside juicy. I love that such a simple recipe can taste like something you’d get at a restaurant.
Perfect for Meal Prep, Lunch, or Dinner
This chicken works for any meal, not just dinner. I like to cook a few pieces at once on Sunday, then slice them up for salads, wraps, and rice bowls during the week. They stay juicy even after reheating, so it’s an easy way to save time and eat better. Having ready-to-go chicken makes it simple to put together a healthy lunch or quick dinner.
Healthy, Lean Protein Option
Chicken breast is a great source of lean protein. It has a lot of protein but very little fat, which makes it good for anyone trying to eat healthy or stay full longer. I often pair it with veggies or rice for a balanced meal. It’s a simple way to feed the whole family something tasty and good for them.
Ingredients You’ll Need
The Chicken – Picking the Right Breasts
- Use boneless, skinless chicken breasts – they cook fast and stay tender.
- Pick pieces that are close in size and thickness so they cook evenly.
- If one breast is too thick, pound it gently with a meat mallet or rolling pin.
- This step keeps the chicken from drying out and makes it cook evenly.
Seasonings That Boost Flavor
- Start with the basics: salt and black pepper.
- Add garlic powder and Italian seasoning for extra taste.
- A little smoked paprika adds color and a light smoky flavor.
- Adjust spices to your taste — I use more garlic powder when I want a stronger flavor.
Oil and Butter – Getting the Best Sear
- Olive oil is great for cooking on high heat.
- Butter adds a rich, tasty flavor.
- I use a mix: olive oil first, then butter at the end for flavor.
- Make sure the pan is hot before adding chicken to get a nice golden crust.
How to Make Perfect Sautéed Chicken Breasts (Step-by-Step)
Step 1 – Pound the Chicken for Even Cooking
- Start by placing the chicken breasts between two sheets of parchment paper or plastic wrap.
- Use a meat mallet or rolling pin to gently pound the thicker parts until they match the thinner side.
- This helps the chicken cook evenly and stay juicy instead of drying out on the edges.
- I always do this step — it makes a huge difference in how tender the final dish turns out.
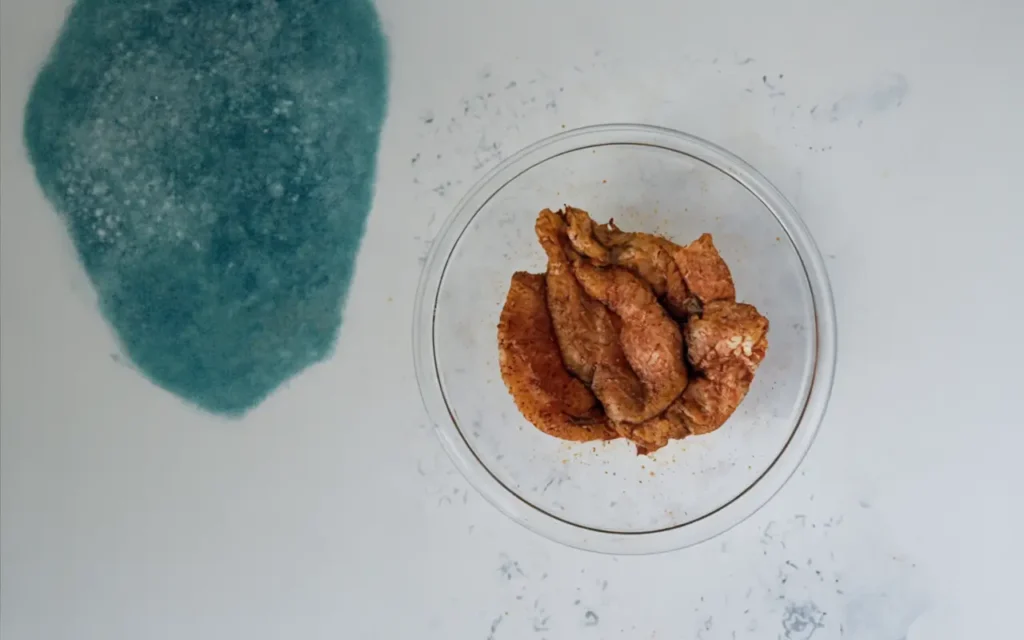
Step 2 – Season Generously
- Sprinkle salt, black pepper, garlic powder, and Italian seasoning over both sides of the chicken.
- Add a light dusting of smoked paprika for color and a hint of smoky flavor.
- Seasoning generously is key — it’s what turns plain chicken into a flavorful, restaurant-style meal.
- I usually season on a cutting board so nothing gets wasted.
Step 3 – Heat Your Pan (Oil vs. Butter)
- Use a large skillet and heat it over medium-high heat until hot.
- Add olive oil first — it handles high heat better and prevents sticking.
- When the oil shimmers, add a small pat of butter for flavor.
- I’ve found this combo gives you the best golden crust without burning the butter.
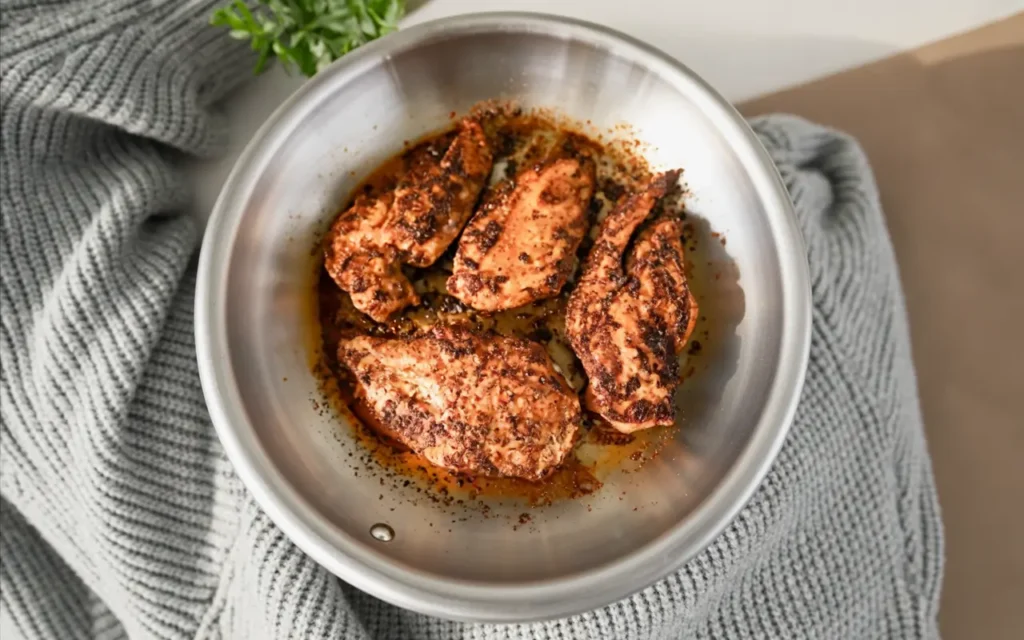
Step 4 – Sear Without Moving (Create a Golden Crust)
- Place the chicken breasts in the hot pan and do not move them for 3–4 minutes.
- This undisturbed sear creates that beautiful golden crust we all love.
- Moving the chicken too soon can tear the surface and stop it from browning evenly.
- I always listen for the sizzle — it’s the sign that a good crust is forming.
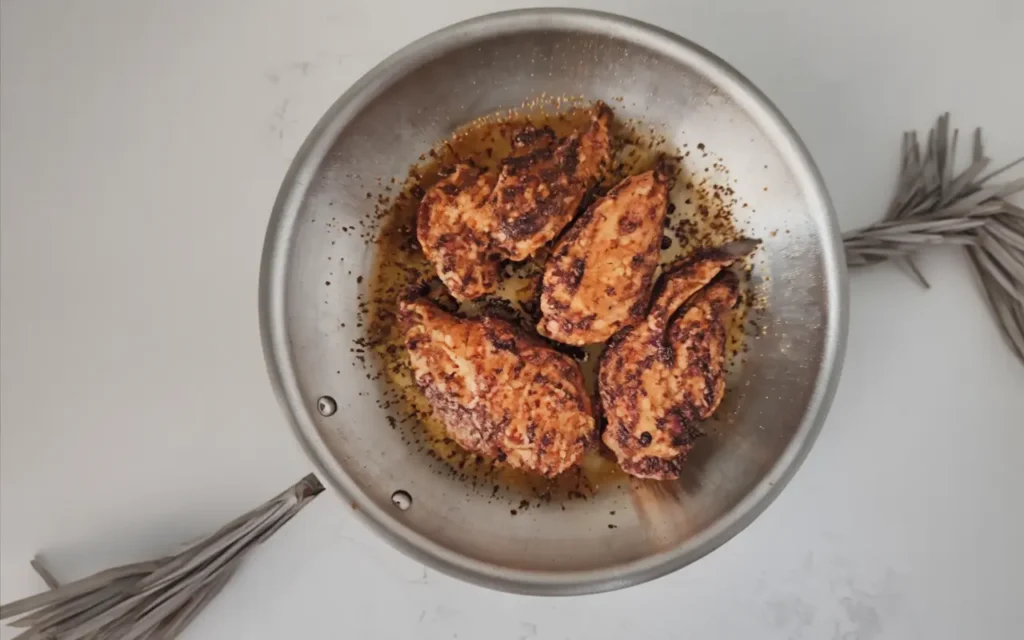
Step 5 – Flip and Cook to 165°F (75°C)
- Flip the chicken using tongs once the first side is golden brown.
- Cook the second side until the internal temperature reaches 165°F (75°C) — this is the safe cooking temperature recommended by USDA Food Safety.
- If the outside is browning too fast, lower the heat slightly so the inside cooks through without drying out.
- A meat thermometer is a game-changer — no guessing, no overcooking.
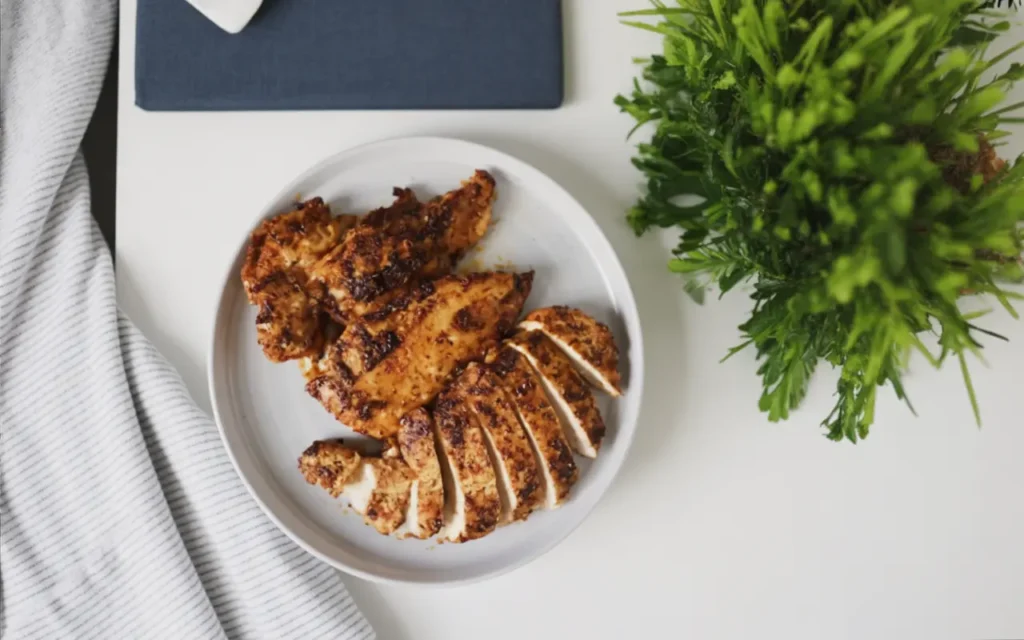
Step 6 – Rest Before Slicing
- Transfer the chicken to a plate and cover loosely with foil.
- Let it rest for 5 minutes so the juices can redistribute inside the meat.
- Skipping this step can make the chicken lose its juices when sliced.
- I always rest my chicken — it keeps every bite moist and flavorful.
Chef Tips for Juicy, Flavorful Chicken
Don’t Overcrowd the Pan
If you put too much chicken in the pan, the heat drops, and the chicken will steam instead of sear. This means no golden crust and less flavor. Cook in batches if needed — it only takes a little more time but gives much better results. Keep space between each piece so the heat can move around and brown the chicken evenly.
Use a Meat Thermometer
A meat thermometer makes cooking chicken easy and safe. Chicken is fully cooked when it reaches 165°F (75°C) inside, based on USDA safety rules. I always check the thickest part of the chicken breast. This simple step helps keep the chicken juicy and stops it from drying out.
Deglaze with Wine or Broth for Extra Flavor
After cooking, use the flavor stuck to the pan to make a quick sauce. Add a splash of white wine, chicken broth, or even water to the pan. Stir and scrape the bottom with a spoon to loosen the browned bits. I like to add a small piece of butter at the end to make the sauce smooth and tasty.
Variations & Flavor Twists
| Variation | How to Make It | Pro Tip / Serving Idea |
| Lemon Herb Sauteed Chicken | Add fresh lemon juice and chopped herbs (parsley, thyme, basil) right after cooking. | Squeeze lemon while chicken is hot for the brightest flavor. Pairs well with roasted veggies or salad. |
| Garlic Butter Chicken Breasts | Melt butter in the pan, add minced garlic for 30 seconds, then coat chicken in the sauce. | Spoon the extra garlic butter over rice or mashed potatoes for a full meal. |
| Smoky Paprika or Chili Chicken | Mix smoked paprika, chili powder, or cayenne with your seasoning for a smoky, spicy kick. | Adjust spice level to taste. Great with grilled corn, roasted potatoes, or black beans. |
| Creamy Dijon or Lemon Sauce | Deglaze pan with chicken broth, add Dijon mustard or lemon juice, then stir in cream for a silky sauce. | Serve over pasta or rice to soak up every drop of the sauce. |
Serving Suggestions
Over Rice, Pasta, or Mashed Potatoes
- Serve chicken breasts over steamed rice, creamy mashed potatoes, or cooked pasta for a filling dinner.
- Spoon the pan sauce over the top for extra flavor.
- I love this on busy nights — it feels comforting but still quick.
With Sauteed Vegetables or Salad
- Pair the chicken with sauteed vegetables like green beans, zucchini, or bell peppers.
- A fresh garden salad or Caesar salad also works well for a lighter meal.
- I often toss veggies in the same pan after cooking chicken to soak up the flavor.
Sliced for Sandwiches or Wraps
- Slice leftover chicken thin and use it for sandwiches, wraps, or paninis.
- Add lettuce, tomato, and a simple dressing for a quick lunch.
- This is one of my favorite ways to use leftovers — it saves time and tastes fresh.
Storing & Reheating Tips
Best Way to Store Cooked Chicken
Let the chicken cool completely before storing. Place it in an airtight container and keep it in the fridge for up to 3–4 days, as recommended by USDA food safety guidelines. I always store the chicken with a little bit of pan sauce or broth if I have it — it helps keep it moist. Labeling the container with the date makes it easy to track freshness.
How to Reheat Without Drying Out
The key to juicy reheated chicken is low and slow heat. Warm it in a covered skillet over low heat with a splash of water or broth until heated through. You can also reheat it in the oven at 300°F (150°C) for 10–15 minutes. I avoid microwaving when possible, but if I do, I cover the chicken with a damp paper towel to keep it from drying out.
Freezing for Later
Cooked chicken freezes well for meal prep. Slice or shred it first, then place it in a freezer-safe bag or container. I like to freeze portions with a bit of sauce or broth to lock in flavor. For best results, use it within 2–3 months and thaw in the fridge overnight before reheating.
Common Mistakes to Avoid
Overcooking Chicken
One of the biggest mistakes is cooking chicken too long. Overcooked chicken turns dry and chewy fast. I always use a meat thermometer to check that it reaches 165°F (75°C) — the safe cooking temperature recommended by the USDA. Pulling it off the heat at the right moment keeps it juicy and tender.
Not Preheating the Pan
Putting chicken into a cold or barely warm pan is another common issue. If the pan isn’t hot enough, the chicken won’t get that golden crust — it will steam instead. I heat my pan for a couple of minutes until it’s hot enough that a drop of water sizzles right away. This simple step makes the outside crisp and flavorful while keeping the inside moist.
Using Too Little Seasoning
Under-seasoning is easy to do, but it makes chicken taste flat. Salt, pepper, and spices bring out the natural flavor of the meat. I season generously on both sides before cooking — and sometimes even again after cooking for a final boost. A good seasoning blend can turn plain chicken into something that tastes like it came from a restaurant.
FAQs (Frequently Asked Questions)
What is the best oil for sauteing chicken?
The best oils are those that handle heat well, like olive oil, avocado oil, or canola oil. I often use olive oil because it gives a light, tasty flavor and works well for pan-searing. If you want a richer taste, add a small pat of butter at the end of cooking — this gives your chicken that restaurant-style finish.
How do I keep chicken from drying out?
The secret is not to overcook it. I always check with a meat thermometer and pull the chicken off the heat as soon as it reaches 165°F (75°C). Letting it rest for a few minutes before slicing keeps all those tasty juices inside.
Can I use chicken thighs instead of breasts?
Yes! Boneless, skinless chicken thighs work great and stay even juicier because they have a bit more fat. You may need to cook them a minute or two longer, but the process is the same — season, sear, and check the temperature.
Do I need to pound chicken breast before cooking?
It’s not required, but I highly recommend it. Pounding chicken to an even thickness helps it cook evenly and prevents dry spots. If one end is too thick, it will take longer to cook and might overcook the thin side.
Conclusion
If you’re looking for an easy weeknight chicken recipe, this is the one. Sautéing chicken is quick, mess-free, and gives you juicy chicken every time. I’ve tried baking, grilling, and air-frying, but nothing beats how fast and tasty this method is when I’m in a rush after work. It’s one of those simple chicken dinners that you can always count on.
The best part? You can change it up with different seasonings or sauces. Some nights I go for garlic butter and herbs, and other times I toss it with teriyaki or honey mustard for a sweet twist. This keeps it from getting boring, and my family actually asks for it every week — which is saying something!