
If you want to know how to roast butternut squash, you are in the right place. Roasting brings out its natural sweetness and makes it soft with slightly crispy edges. This easy dish works for a quick weeknight dinner or as a special holiday side. It’s one of the simplest and tastiest ways to enjoy this healthy vegetable.
I’ve cooked roasted butternut squash many times, and I’ve learned a few tricks. When I first started, I cut uneven pieces and ended up with some too soft and some still hard. Now, I always cut even cubes, toss them with olive oil, and roast them in a hot oven. The result is golden, tender, and full of flavor every time.
This recipe is great for beginners and fun for anyone who likes to try new flavors. Keep it simple with just salt and pepper, or mix it up with maple syrup, cinnamon, or garlic. By the end of this guide, you’ll know exactly how to prep, season, and roast butternut squash like a pro.
Why You’ll Love This Roasted Butternut Squash Recipe
This recipe is quick and simple, so anyone can make it. You only need a few ingredients and a baking sheet. Even if it’s your first time cooking squash, it will turn out tasty. It’s an easy way to make a healthy side dish without spending a lot of time in the kitchen.
The flavor is what makes it special. Roasting brings out the natural sweetness and makes the edges golden and a little crispy. I remember the first time I made it right — soft in the middle, crispy on the outside — and it became one of my favorite fall recipes. It goes well with chicken, fish, or even just a fresh salad.
It’s also perfect for meal prep. I like to roast a big batch on Sunday and add it to salads, grain bowls, or wraps during the week. It’s a simple way to keep dinners healthy and fun. Plus, it’s a vegan side dish, so it works for almost any guest at the table.
Ingredients You’ll Need
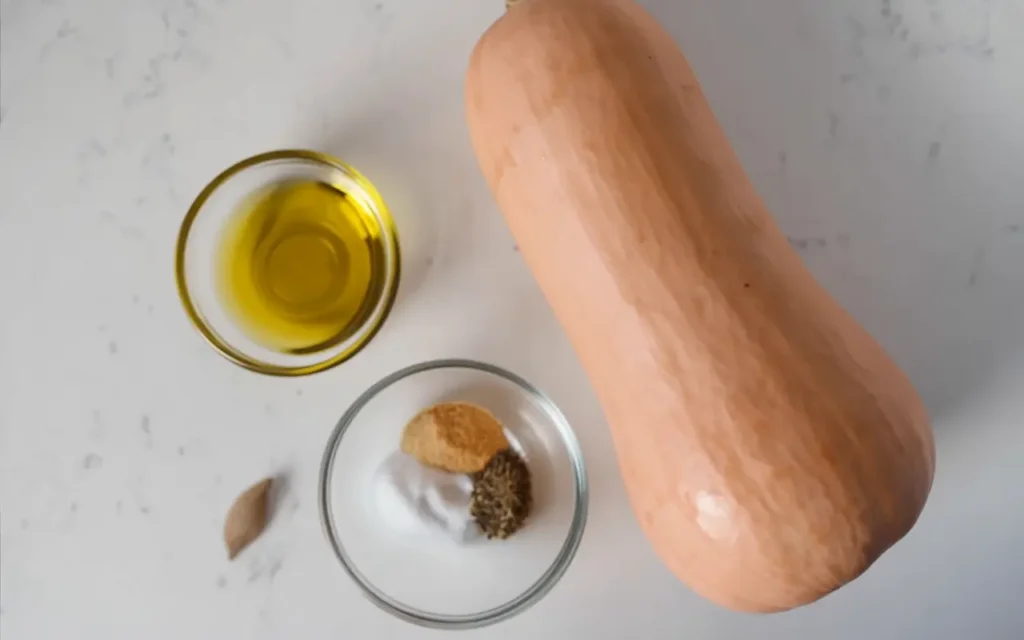
Roasted butternut squash needs only a few basic ingredients. Here’s what to grab before you start:
Main Ingredients
- Butternut squash – Peel, remove seeds, and cut into even cubes so they cook evenly.
- Olive oil or avocado oil – Helps the cubes get crispy and golden.
- Salt & pepper – Simple but perfect for bringing out the natural sweetness.
Optional Flavor Boosters
- Garlic powder – Adds a savory, slightly bold flavor.
- Maple syrup or honey – For a sweet, caramelized finish.
- Cinnamon or nutmeg – Gives it a warm, cozy fall taste.
- Fresh rosemary or thyme – Adds freshness and makes it smell amazing while roasting.
Pro Tip: I like to mix maple syrup with a pinch of cinnamon when making squash for the holidays — it turns into a sweet, slightly sticky glaze that everyone loves.
Step-by-Step Instructions (Roasting Butternut Squash)
Preheat & Prep
- Preheat your oven to 400°F (200°C). This temperature is perfect for roasting butternut squash because it helps create crispy, golden edges while keeping the inside soft.
- Line a baking sheet with parchment paper or a silicone baking mat. This prevents sticking and makes cleanup faster.
- Cut the squash into even cubes. This ensures they cook at the same speed. I’ve learned that uneven pieces can leave you with some too soft and some too hard.
- Spread cubes in a single layer. Overcrowding traps steam and makes the squash soggy instead of roasted.
Toss & Season
- Add cubes to a large mixing bowl. This gives you room to toss without spilling.
- Drizzle with 1–2 tablespoons of oil (olive oil or avocado oil work great). Oil helps caramelize the squash.
- Season generously with salt, black pepper, and garlic powder.
- For extra flavor, I sometimes add paprika, thyme, or cinnamon depending on whether I want a savory or slightly sweet side dish.
- Toss until every piece is coated. This step is key for even roasting and flavor.
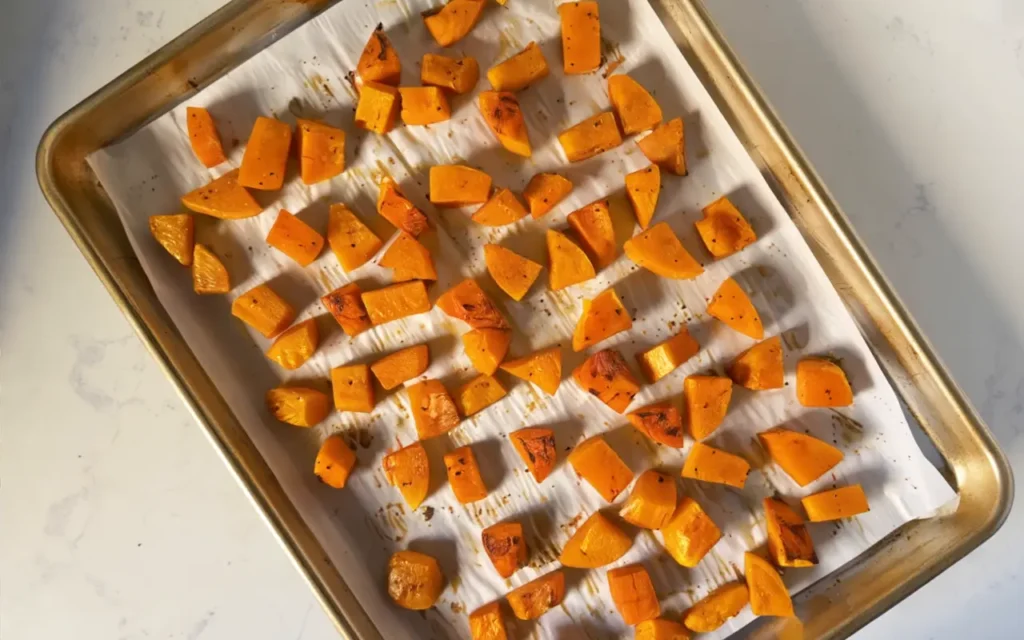
Roast to Perfection
- Arrange cubes evenly on the lined baking sheet with space between each piece. Crowding leads to steaming, not crisping.
- Roast for 25–35 minutes. Flip halfway through so all sides brown nicely.
- Look for caramelized edges. They should be golden and slightly crispy—that’s where the best flavor is.
- If you want extra crispiness, roast 3–5 minutes longer, but watch closely to prevent burning.
- Let them cool for a few minutes before serving. This helps them firm up slightly and makes them easier to handle.
Roasting Variations
Sweet Version
- Drizzle maple syrup or honey over the butternut squash cubes before roasting. This gives a natural sweetness that caramelizes beautifully in the oven.
- Sprinkle cinnamon or nutmeg to add warmth and depth to the flavor. I like using cinnamon in the fall—it makes the kitchen smell like fresh-baked pie.
- This version pairs well with roasted turkey, chicken, or even as a topping for salads with goat cheese and pecans.
Savory Version
- Toss squash cubes with minced garlic, olive oil, and fresh rosemary or thyme. The herbs release their aroma as they roast, making the kitchen smell amazing.
- I prefer this version for weeknight dinners because it pairs perfectly with roasted chicken or grilled fish.
- For extra richness, sprinkle a little grated Parmesan during the last 5 minutes of roasting for a cheesy, golden crust.
Spicy Version
- Add cayenne pepper, chili powder, or smoked paprika for a kick. This is my go-to when I want something bold and exciting.
- Combine with olive oil and salt so the spice sticks to each cube.
- This variation is perfect for pairing with tacos, grilled meats, or adding a spicy twist to Buddha bowls.
Whole Roasted Butternut Squash (Alternative Method)
Sometimes, you just don’t feel like peeling and cubing squash—and that’s where this method shines. Roasting the halves is quick to prep and gives you soft, flavorful squash that’s easy to mash or scoop. I love using this method on busy weeknights because it’s almost completely hands-off.
Here’s how to do it:
- Preheat oven to 400°F (200°C).
- Cut butternut squash in half lengthwise and scoop out the seeds.
- Place halves cut-side down on a lined baking sheet.
- Roast for 45–60 minutes, or until the flesh is fork-tender.
- Flip over, let cool slightly, then scoop out the flesh.
Serving ideas:
- Mash with butter or olive oil for a simple side dish.
- Drizzle with maple syrup or honey and sprinkle cinnamon for a sweet version.
- Add garlic powder, fresh herbs, or Parmesan for a savory option.
- Use the roasted flesh as a base for creamy soups or risottos.
Tips for Perfect Roasted Butternut Squash
Getting perfect roasted butternut squash is all about technique. I’ve learned over time that small adjustments make a big difference in taste and texture. Here’s how you can get squash that’s flavorful, golden, and never soggy.
1. Avoid Soggy Squash
- Spread the cubes in a single layer on the baking sheet so they roast instead of steam.
- Don’t overcrowd the pan—use two baking sheets if needed.
- Pat the squash dry with a paper towel before tossing with oil to remove extra moisture.
2. Get Crispy, Caramelized Edges
- Roast at 400°F (200°C) or slightly higher for deep golden edges.
- Use just enough oil to coat but not drown the cubes.
- Flip halfway through cooking to get even browning on all sides.
- For extra crispiness, sprinkle a little cornstarch with the seasoning before roasting.
3. Meal Prep & Storage
- Roast a big batch and let it cool completely.
- Store in an airtight container in the fridge for up to 4 days.
- Reheat in the oven or air fryer at 375°F to bring back the crisp edges—avoid microwaving if you want to keep them from getting soft.
- You can also freeze roasted squash for up to 3 months—just reheat directly from frozen.
I often make a double batch on Sundays so I have a healthy side ready for weeknight dinners or a quick lunch salad topping. This little trick saves me time and keeps me eating well all week.
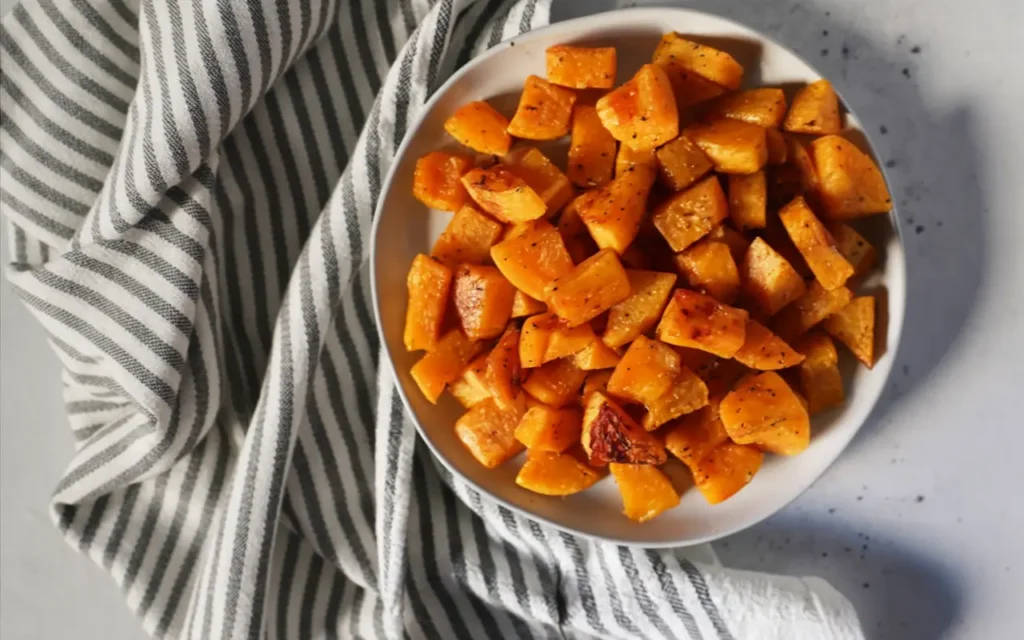
Serving Suggestions & Pairings
Roasted butternut squash is one of those sides that goes with almost anything. Its natural sweetness and caramelized edges make it easy to pair with both savory and slightly sweet dishes. I often make extra because I know I’ll use it in different meals over the next couple of days.
Serve it as a side dish:
- Pair with roast chicken, grilled fish, or steak for a balanced dinner.
- Serve alongside quinoa, farro, or brown rice to make a hearty grain bowl.
- Add it to your Thanksgiving or holiday table as a colorful, healthy side.
Use it in salads, bowls, or soups:
- Toss warm cubes into a kale or arugula salad with feta, pumpkin seeds, and balsamic glaze.
- Add to Buddha bowls with chickpeas, avocado, and tahini dressing.
- Blend into a creamy butternut squash soup or stir into chili for extra sweetness.
Turn it into a fun topping:
- Use as a taco filling with black beans, pickled onions, and cotija cheese.
- Toss with pasta, garlic, and Parmesan for a quick vegetarian dinner.
- Top a flatbread or pizza with squash, caramelized onions, and goat cheese.
I personally love using leftover roasted squash in grain bowls for lunch—it keeps me full and adds a pop of color to the plate. It’s a simple way to eat more veggies without feeling like you’re eating the same thing every day.
Storage & Reheating Tips
Roasted butternut squash keeps really well, which makes it perfect for meal prep. I often roast a double batch on Sunday and store it for quick sides, grain bowls, or snacks during the week. The key is storing and reheating it the right way so it stays flavorful and doesn’t turn soggy.
How to Store:
- In the fridge: Place cooled squash in an airtight container and store for up to 4 days.
- In the freezer: Spread cooled cubes on a baking sheet, freeze until solid, then transfer to a freezer bag or container. This keeps them from sticking together and makes it easy to take out only what you need.
How to Reheat Without Losing Texture:
- Oven method (best): Reheat at 375°F for 8–10 minutes on a baking sheet to bring back the crisp edges.
- Air fryer option: 3–5 minutes at 375°F works perfectly if you want them crispy again.
- Avoid microwaving if possible—it makes them soft and watery. If you must use the microwave, reheat in short bursts and pat dry before serving.
I’ve found the oven method works best when serving squash to guests because it tastes like it was freshly roasted. It’s a small step, but it makes a big difference in flavor and texture.
Common Mistakes to Avoid
Even simple recipes can go wrong if you skip a few key steps. I’ve learned these lessons the hard way when my first batch of roasted butternut squash turned out soft and pale instead of golden and crispy. Here’s how to avoid the most common mistakes so you get perfect results every time.
1. Overcrowding the Pan
- If you pack too many squash cubes on the pan, they steam instead of roast.
- Spread them in a single layer with space between each piece.
- Use two baking sheets if needed — I often do this when cooking for guests so every piece gets those caramelized edges.
2. Skipping the Oil
- A light coat of olive oil or avocado oil is key for browning and flavor.
- Toss until every cube is coated — this also helps the seasoning stick.
- I once tried roasting without oil to “save calories,” and the result was dry and chewy. Don’t skip this step.
3. Using Too Low Oven Temperature
- Roasting works best at 400°F (200°C) for that golden color and tender center.
- Lower heat will make the squash soft and dull instead of crisp and caramelized.
- Preheating the oven fully before baking makes a big difference in texture.
These small fixes turn ordinary roasted squash into something worthy of a holiday table or a quick weeknight dinner.
Nutrition & Health Benefits
Butternut squash is a powerhouse vegetable that tastes good and is great for your health. It’s low in calories but high in fiber, which helps keep you full longer and supports good digestion. I often use it as a lighter swap for potatoes when I want a cozy but healthier meal.
Here’s what makes it extra special:
- Packed with vitamins: It’s loaded with Vitamin A and C, which help boost your immune system and keep your skin healthy.
- Rich in minerals: You’ll get potassium for muscle health and steady energy levels.
- Great for any diet: It’s naturally gluten-free, perfect for vegan recipes, and a tasty way to add more plants to your meals.
I’ve found that adding roasted butternut squash to grain bowls or salads makes them more filling without adding too many calories. Plus, its natural sweetness means you don’t need heavy sauces or extra sugar — just simple seasonings work beautifully.
FAQs (Frequently Asked Questions)
Can you roast butternut squash without oil?
Yes! You can roast without oil, but the squash will be softer and less caramelized. Oil helps create crispy, golden edges and richer flavor. If you prefer no oil, try tossing the cubes with a little vegetable broth or lemon juice. I’ve done this before, and while it works, the result is more tender than crispy.
Can you air fry butternut squash?
Absolutely. Air frying is faster and still gives you crispy results. Cut the squash into even cubes, toss with a small amount of oil and spices, and cook at 400°F (200°C) for 12–15 minutes. Shake the basket halfway through for even cooking. I often use this method when I just want a quick side without heating the whole oven.
Do you need to peel butternut squash before roasting?
Not always. The skin softens as it roasts and is safe to eat, though it can be a bit chewy. If I’m roasting cubes or wedges, I usually leave the skin on to save time. But if I’m making a creamy soup or purée, I always peel it to get a smooth texture.
Conclusion
Roasting butternut squash is one of the easiest ways to turn a simple vegetable into a cozy, flavorful side dish. It’s naturally sweet, packed with fiber, and loaded with vitamins like A and C, making it a healthy choice for any meal. Plus, it pairs beautifully with chicken, fish, or even grain bowls, making dinner planning much easier.I always recommend trying a few seasoning variations to find your favorite. Sweet versions with maple syrup and cinnamon are perfect for fall, while garlic and rosemary bring a more savory flavor. When I want something bold, a pinch of cayenne or chili powder adds the right amount of heat.
Now it’s your turn — experiment with your own flavor combos and see which one you love most. I’d love to hear what seasoning you try first! Sharing ideas helps others discover new, tasty ways to enjoy roasted vegetables and keep meals exciting.