
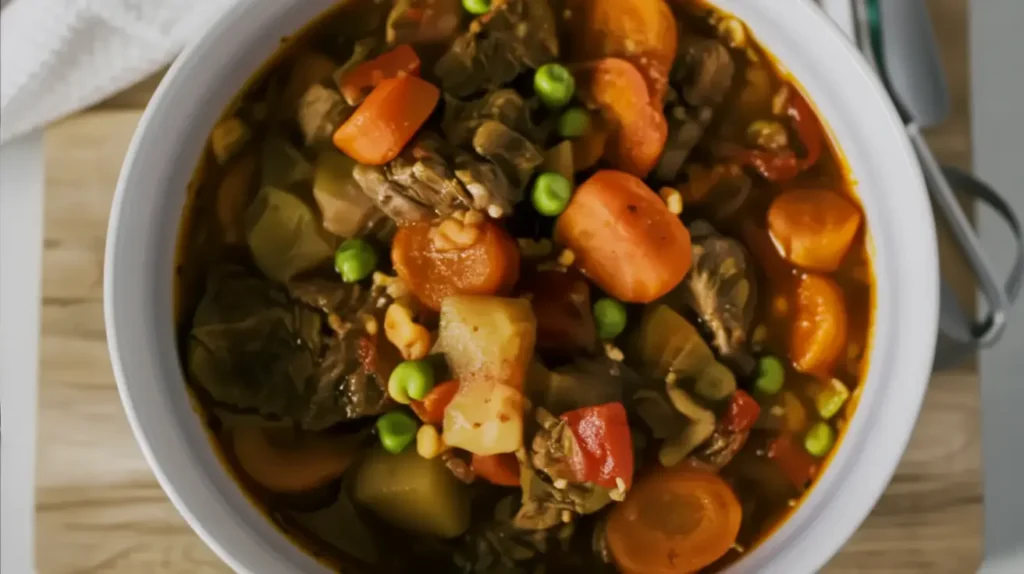
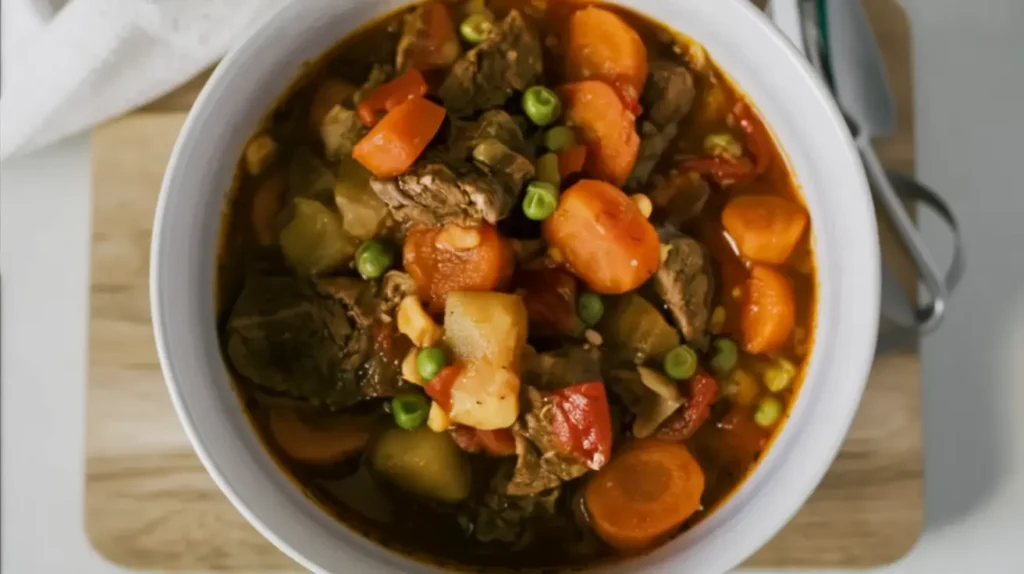
A warm bowl of vegetable beef soup is one of the coziest meals you can have. Using an Instant Pot makes it fast and easy. Instead of spending hours on the stove, you can have tender beef, soft vegetables, and flavorful broth ready in under an hour. I’ve tried this many times, and pressure cooking not only saves time but makes the soup taste like it’s been simmering all day.
This soup is healthy too. The beef gives protein and iron, while the vegetables add fiber, vitamins, and minerals. You can use fresh or frozen vegetables, and it will still taste great. I like adding carrots, green beans, and potatoes because they make the soup tasty and filling for everyone.
The Instant Pot Vegetable Beef Soup also brings out strong flavors. Browning the beef first and then pressure cooking keeps all the taste inside. If you want a quick beef soup or a simple pressure cooker vegetable beef soup, this method works every time. It’s easy, fast, and perfect for weeknight dinners.
Ingredients You’ll Need
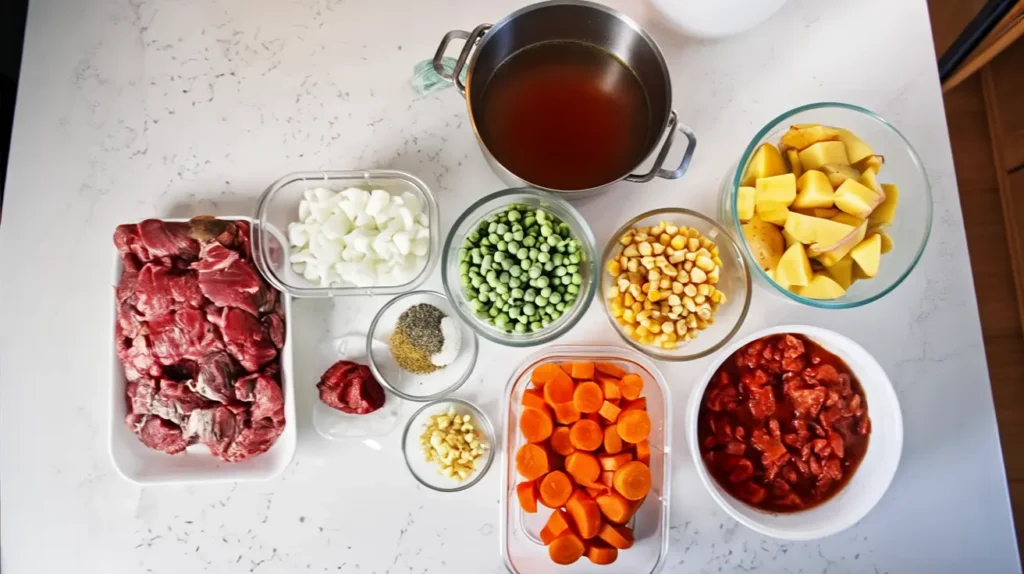
Essential Ingredients
- Beef stew meat (cubed) – gives the soup protein and rich flavor. I like browning it first in olive oil for extra taste.
- Beef broth or stock – the base of your soup; makes it hearty and savory.
- Diced tomatoes (canned) – adds a subtle tang and depth.
- Vegetables (fresh or frozen) – carrots, green beans, corn, peas, potatoes, celery. Frozen veggies work great when you’re short on time.
- Onion and garlic – essential for flavor and aroma.
- Seasonings – Italian seasoning, Worcestershire sauce, salt, and pepper. These tie all the flavors together.
- Olive oil – for sautéing the beef and veggies to boost flavor.
Optional Add-ins
- Orzo or ditalini pasta – for a thicker, heartier soup.
- Parsnips or turnips – for extra texture and flavor.
- Fresh herbs like parsley – added at the end for freshness.
- Tomato paste – makes the broth richer and darker.
- Bay leaves – adds subtle aroma and depth.
Step-by-Step Cooking Instructions
1. Sauté the Beef
First, turn your Instant Pot to ‘Sauté’ mode. Add a little olive oil and brown the beef stew meat in batches. Browning in small batches helps the meat cook evenly and adds extra flavor to the soup. I always sprinkle a pinch of salt and pepper while browning—it makes a noticeable difference in taste.
2. Sauté Aromatics
Next, add diced onion and minced garlic to the pot. Sauté them until soft and fragrant. The aroma fills the kitchen and forms the flavor base for your soup. From my experience, skipping this step can make the soup taste flat, so don’t rush it.
3. Deglaze the Pot
Pour in a little beef broth to loosen the browned bits stuck to the bottom of the pot. These browned bits, called fond, are full of flavor and help make the broth rich and tasty. I usually swirl the liquid around the pot with a wooden spoon to scrape everything off.
4. Add Vegetables and Seasonings
Now, stir in the remaining beef broth, diced tomatoes, carrots, potatoes, celery, and any optional vegetables you like. Add Worcestershire sauce, Italian seasoning, and bay leaves to boost flavor. I like adding a little more seasoning than recipes suggest—it gives the soup a comforting, home-cooked taste.
5. Pressure Cook
Seal the Instant Pot lid and set it to ‘Manual’ or ‘Pressure Cook’ on high for 20 minutes. When cooking is done, let the pressure release naturally for 10 minutes, then carefully do a quick release for any leftover pressure. Natural pressure release helps the meat stay tender and the flavors develop fully.
Tips for Perfecting Your Soup
Seasoning Adjustments
After your soup is cooked, always taste and adjust the seasoning. Pressure cooking can soften flavors, so adding a little extra salt, pepper, or Italian seasoning at the end can really make the soup pop. I like tasting mine before serving and sometimes add a small dash of Worcestershire sauce—it gives the broth a deeper, richer flavor.
Thickening the Soup
If you want a heartier soup, you can thicken it easily. Mix a small amount of cornstarch with cold water and stir it into the soup while it’s still warm. I often do this when making soup for meal prep because it makes each serving feel more filling without changing the flavor.
Freezing Instructions
This soup is perfect for freezing. Let it cool completely, then pour it into airtight containers. It will keep in the freezer for up to three months. From experience, freezing in single-portion containers works best—you can just thaw what you need, which saves time on busy nights.
Serving Suggestions
Pairings
- Serve with crusty bread – perfect for dipping and makes the meal cozy.
- Add a side salad – balances the richness of the beef and adds color and freshness.
- Top with a dollop of sour cream – adds creaminess and extra flavor.
- Optional: sprinkle fresh parsley or grated cheese for a finishing touch.
Meal Prep
- Make a big batch to enjoy leftovers throughout the week.
- Store in airtight containers and reheat easily for busy weeknights.
- Perfect for work lunches or meal prep plans.
Extra Tips
- Let the soup sit for a few hours after cooking—flavors get stronger and richer.
- Pairing with bread or salad enhances both taste and nutrition.
- Great for family dinners or cozy meals on cold evenings.
Nutritional Information (Per Serving)
| Nutrient | Amount Per Serving | Notes / Benefits |
| Calories | 250 kcal | Light but filling; perfect for a wholesome meal. |
| Protein | 20 g | Supports muscle health and keeps you full. |
| Fat | 10 g | Comes mostly from beef and olive oil; adds flavor without being heavy. |
| Carbohydrates | 25 g | Provides energy from vegetables and optional pasta. |
| Fiber | 5 g | Helps with digestion and keeps you full longer. |
Variations to Try
- Low-Carb Version: Replace potatoes with cauliflower florets for a lighter, lower-carb soup. Cauliflower absorbs the flavors well and keeps the soup hearty.
- Spicy Kick: Add diced jalapeños or a dash of hot sauce for extra heat. Start small and taste as you go to avoid overpowering the flavors.
- Vegetarian Option: Omit the beef and use vegetable broth. Add extra beans like kidney or cannellini for protein, making it a filling, meat-free meal.
- Extra Tips: You can mix and match these variations—like a spicy, low-carb version—to suit your taste. These options make the soup versatile for different diets and family preferences.
FAQs (Frequently Asked Questions)
Can I use frozen beef in my Instant Pot Vegetable Beef Soup?
Yes! You can use frozen beef, but increase the cooking time by about 5 minutes. This makes sure the meat becomes tender while the vegetables cook perfectly. I’ve done this many times when I forgot to thaw beef, and it still tastes rich and flavorful.
Is Instant Pot Vegetable Beef Soup gluten-free?
Yes, it can be gluten-free if you skip any pasta or use a gluten-free alternative. I often make this version for friends who avoid gluten, and it still comes out hearty and satisfying.
Can I make Instant Pot Vegetable Beef Soup in a slow cooker?
Absolutely. Cook on low for 6–8 hours or high for 3–4 hours. I sometimes use the slow cooker when I want to start the soup in the morning and enjoy it ready-to-eat in the evening—it develops deep, rich flavors this way.
Conclusion
Instant Pot Vegetable Beef Soup is a simple, hearty, and nutritious meal that fits perfectly into busy weeknights or cozy family dinners. With tender beef, fresh vegetables, and rich flavors, it’s easy to make and can be customized to suit different tastes or dietary needs. Whether you try a low-carb, spicy, or vegetarian version, this soup is versatile and satisfying.
Making it in the Instant Pot saves time without sacrificing flavor, and it’s perfect for meal prep or freezing for later. From my experience, little touches like tasting for seasoning at the end or adding fresh parsley make a big difference. Overall, this soup is a comforting, reliable option that everyone will enjoy—warm, nourishing, and full of flavor.